This article will help you determine whether your laser has failed and where it has failed.
This page is only applicable to the digital version laser module. How to distinguish?
For Laser Module with Adapter
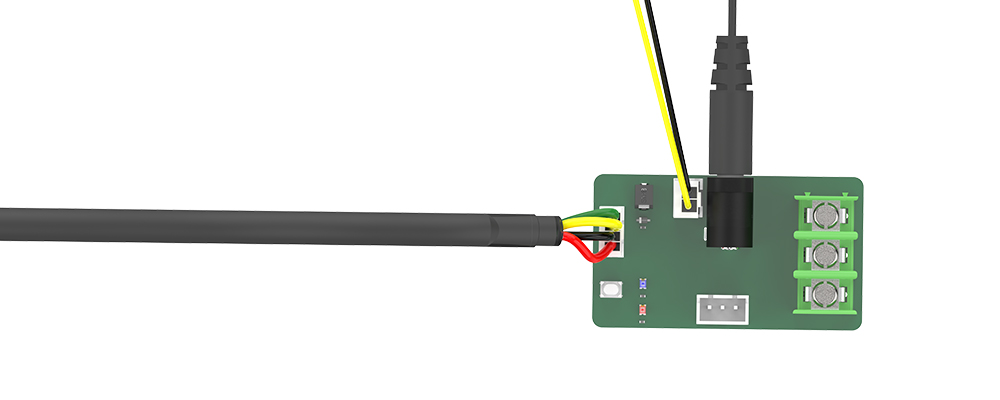
Please do as follow:
- Do not connect the laser module, only connect the 12V power supply to the adapter board
- Now connect the 4P wire to the laser module
- Press the test button on the laser adapter board
Normally:
In step 1, the red LED on the adapter board will light up. After connecting the laser module in step 2, the blue LED will flash, the fan of the laser will rotate, and the LED on the laser will flash. Fan may off after 1 second. In step 3, when you press the test button, the laser will work at full power.
Abnormal conditions:
Check your power supply
Contact us as shown at the bottom of this page.
Contact us as shown at the bottom of this page.
Contact us as shown at the bottom of this page.
Contact us as shown at the bottom of this page.
The current of your power adapter is too low. Please replace the power adapter with a higher power. 12V 5A adapter is recommended
Contact us as shown at the bottom of this page.
For Laser Module With PWM Tester
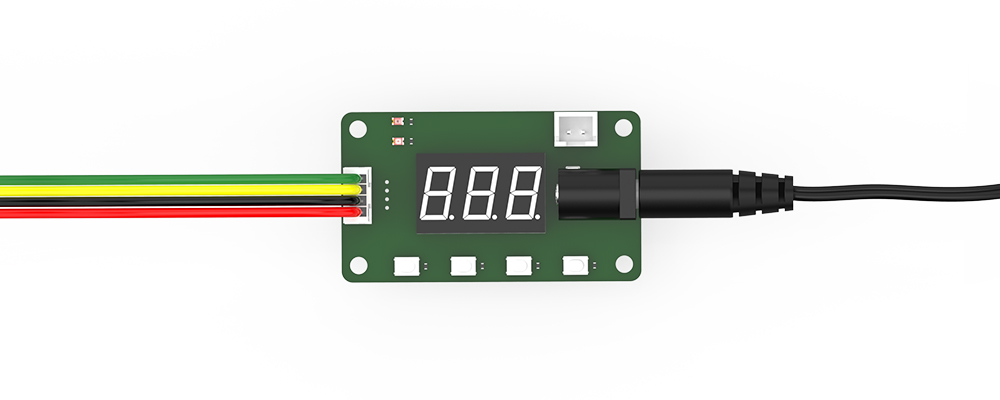
Please do as follow:
- Do not connect the laser module, connect the 12V power supply to the laser test board
- Access laser module
- Press the ℃ button
- Press the switch key to switch to test mode, and 001 should be displayed at this time
- Press the PWM + key continuously until 100%
Normally:
In step 1, connect the power supply to the laser test board, and the test board should display the “off” sign. In step 2, after connecting the laser module, the last point of the digital display should flash. In step 3, press the ℃ button to display the module temperature. In step 4, the nixie tube should display 001. At this time, “test mode” should be on instead of “TTL in” led. At this time, The laser should be a very low power output. In step 5, the laser intensity will gradually increase until 100%
Abnormal conditions:
Check your power supply
Contact us as shown at the bottom of this page.
Contact us as shown at the bottom of this page.
Contact us as shown at the bottom of this page.
Contact us as shown at the bottom of this page.
The current of your power adapter is too low. Please replace the power adapter with a higher power. 12V 5A adapter is recommended
Contact us as shown at the bottom of this page.
For Single Laser Module
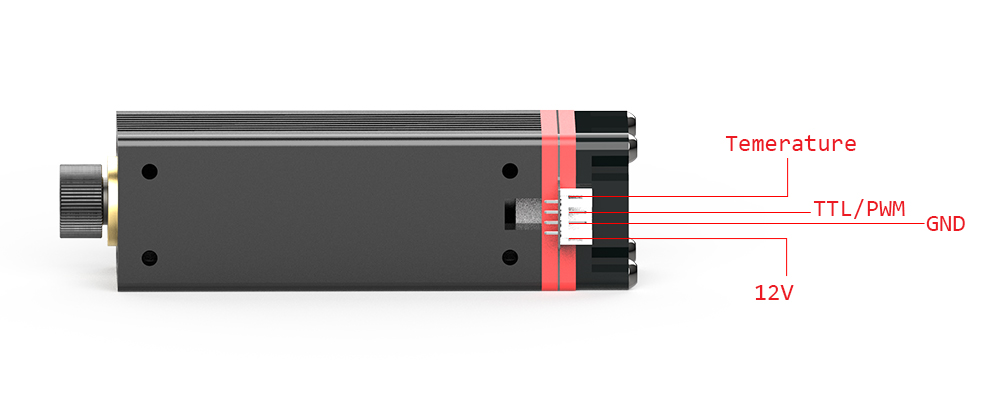
Please do as follow:
- Only connect 12V and GND for your laser, others are empty
- Connect TTL line to 12V
Normally:
In step 1, the fan should on for 1 second, the red led should blink about 7 times. In step 2, your laser should be at full power output.
Abnormal conditions:
Check your power supply
Contact us as shown at the bottom of this page.
Contact us as shown at the bottom of this page.
Contact us as shown at the bottom of this page.
The current of your power adapter is too low. Please replace the power adapter with a higher power. 12V 5A adapter is recommended
Contact us as shown at the bottom of this page.
How to contact us ?
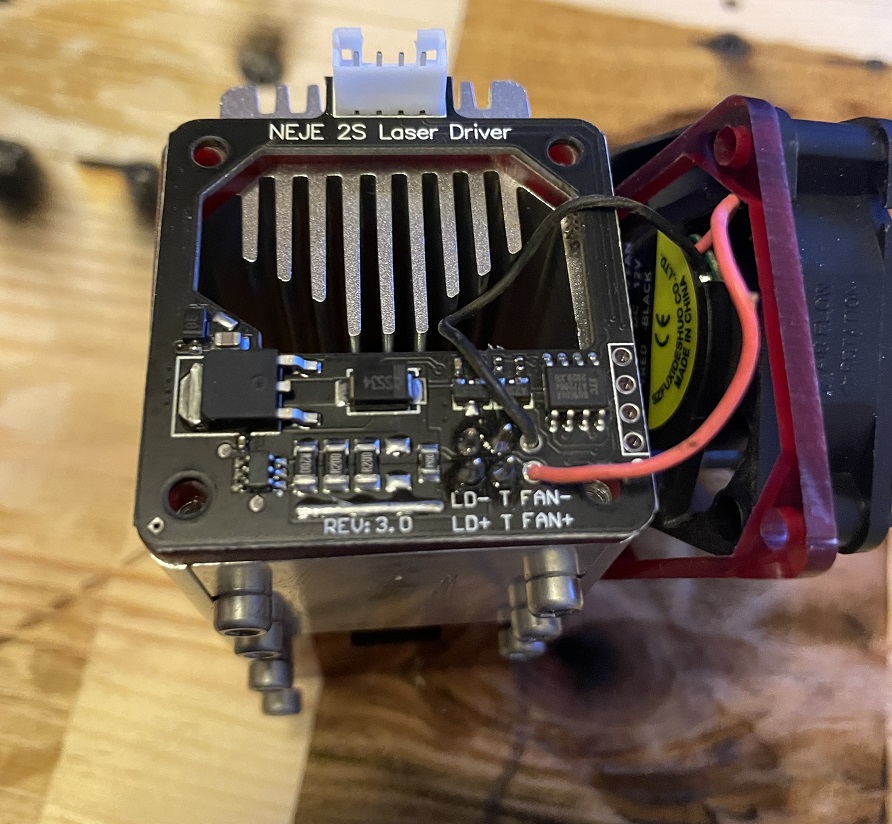
If the laser module does not work properly, please contact us and take a video and a image, the image content is the driver board of your laser module like below
The video content should contain :
- The steps you do(above)
- Allways record the status of the module fan in the video